Welcome to Elderfield Farming Guide
Last updated: 2026-09-29 · 11 min read
Farming looks like the part of Elderfield you already know, and it is where the most assumptions get punished. Your field is not empty when you first walk onto it. Growth is counted in nights rather than days. Watering has a hard ordering rule that most players get backwards. And the whole system feeds the endgame, because the Stone Tower seal is reduced by growing crops and raising animals. This page is the sequence, then the economics.
On day one every tile is occupied by Ghost Tentacles — clear them with Cleansing Balm before anything else. The planting order is strict: clear, then till with the hoe, then fertilize or sow, and only water after seeds are in the ground. Water daily or the crop simply does not grow that night — it will not die, it just will not advance. Grow times are nights, not days: a 4-night crop planted on day 1 is ready on day 5, and it will wither if the season changes while it is in the ground and out of season.
Your Farm Is Not Empty
The single biggest difference from the farming games Elderfield borrows from: at the start of the game, all of your tiles are occupied by Ghost Tentacles, and you have to clear them with Cleansing Balm before you can plant anything. Interact with the tentacle and the balm is consumed.
Where the balm comes from, in the order you will meet them:
| Source | How much | Notes |
|---|---|---|
| Farmer Hans | 8 | Given to you as a gift "to help you start farming" — this is your opening stock |
| "Farmer", a farm visitor | Gift | A fellow farmer who occasionally visits the Farm |
| Edwin | Gift | Given during a farm visit |
| Old Man Crawford | Purchasable | Limited stock: 8. Treat this as a hard cap, not a shop |
| Foraging and monster loot | Random | Found in the Mall Mine and dropped by enemies |
The shop cap of 8 plus Hans's 8 is roughly one field's worth. Balm is also required elsewhere — the "Penpals" task has you clear Ghost Tentacles in a room at Greystone Estates — and the tentacles appear outside the farm too, including at a Town South apartment. Plan which tiles you unlock first rather than clearing everything in sight.
One naming trap while you are here: Ghost Tentacles (the farm-tile obstacle), Tentacle (a harvestable crop that appears in the Hearty Omelette recipe) and the Tentacle Tree (a 2000g Nursery tree seed) are three different things. Only the first is cleared with balm.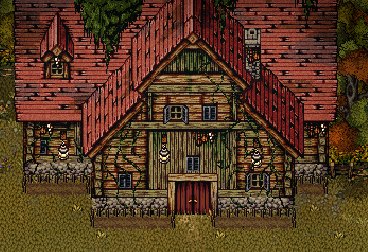
The Planting Order
Four steps, and they are in a fixed order. Doing them out of sequence is why people report that watering "does nothing".
- Clear the tile with a Cleansing Balm if it has Ghost Tentacles.
- Till it with the Basic Gardening Hoe.
- Fertilize or sow. Fertilizer and seeds go onto the tilled tile, one tile at a time until you upgrade your tools.
- Water. Only after a seed is planted — a tile can only be watered once it has a seed in it.
That last point is the rule most players miss. If you till a plot and water the bare soil, nothing happens and nothing is wasted; the game is simply not accepting water on an unplanted tile.
Watering and Growth Time
The rule is exact and worth taking literally: crops must be watered every day for maximum growth. If they are not watered on a given day, the crop will not grow that night. Unwatered crops do not die — they just stop advancing.
Two consequences that change how you plan:
- Grow times are nights, not days, and the planting day does not count. A crop listed at 4 grows in four nights. Planted on day 1, it is ready on day 5. This is the single most common source of "my crop should have been finished by now".
- Missing a day does not kill the crop, it delays it. A crop you forget for two days is simply two nights behind. That makes a large field forgiving but slow, which is the actual trade-off in early farming: breadth costs you total time.
Time rolls over at midnight even if you do not sleep, so a crop advances based on the calendar rather than on your rest. This is also why staying up to farm more is viable, at the cost of Heavy Eyelids on the second night — see blessings and curses.
Tools and Upgrades
Three tools, each with a four-step upgrade chain. The starting versions are bought from Old Man Crawford at the Farmhouse; every upgrade is forged in the Workshop.
| Tool | Tier 1 (bought) | Tier 2 | Tier 3 | Tier 4 |
|---|---|---|---|---|
| Watering Can (range / capacity) | 1 tile / 16 | 3 tiles / 32 | 5 tiles / 48 | 8 tiles / 64 |
| Gardening Hoe (range) | 1 tile | 3 tiles | 5 tiles | 8 tiles |
| Scythe (level) | Rusty, Lv 1 | Basic, Lv 2 | Sturdy, Lv 3 | Quality Lv 4, then Superior Lv 5 |
The Watering Can is the upgrade worth prioritising, because watering is the daily action you cannot skip. Going from 1 tile to 3 tiles per swing cuts the worst part of the day down to a third, and the capacity jump from 16 to 32 means fewer refills mid-field.
There is also a real quality-of-life detail in how targeting works: when you sow or water, stay in place rather than walking to each tile. The game selects the next valid tile within range automatically, so standing still and working outward is much faster than chasing individual plots.
Seasons and the Withering Rule
There are four seasons — Rebirth, Harvest, Witch and Death (spring, summer, autumn and winter, in the game's naming) — each 28 days long, and each ends with its own event.
The rule that costs people whole harvests: when the season changes, a crop that does not belong to the new season withers and dies. Crops are not wiped on a timer, they are wiped by incompatibility. Multi-seasonal crops survive the transition; single-season crops planted late do not.
Practical version: check the night count against the days left in the season before you plant. A 24-night crop like Cauliflower planted on day 10 of a season will not finish. Plant it near the start of a season or in a season it covers.
Crows, Scarecrows and Effigies
Crows eat crops only while they are growing — not after they are fully grown — and only if there is no scarecrow in range. That second condition is the one to internalise: a mature crop sitting in the field waiting for you is safe, so you do not have to harvest the instant it is ready.
| Scarecrow | Crow reduction | How you get it |
|---|---|---|
| Ragged Scarecrow | 20% | Bought from Old Man Crawford |
| Basic Scarecrow | 40% | Crafted at the Workbench |
| Jack o' Scarecrow | 60% | Crafted at the Workbench |
| Tortured Scarecrow | 80% | Crafted at the Workbench |
| Dripping Scarecrow | 100% | Crafted at the Workbench |
One scarecrow per field maximum, so upgrading the scarecrow is the only way to improve coverage. This matters more than it sounds, because the Tax Man's Carrion curse adds 10% crop loss on top — a Ragged Scarecrow offsets only 20%, so an unpaid tax plus a cheap scarecrow means most of the field is exposed.
Effigies are the other field item, capped at two per field:
- Harvest Effigies (Lesser / Medium / Greater) add a 4% / 8% / 12% chance of a double harvest while in range of the field.
- Fertility Effigies (Lesser / Medium / Greater) add an 8% / 16% / 24% chance for an unwatered crop to grow anyway — the insurance option for days you are away from the farm.
Fertilizer
Crafted at the Compost Bin, and only one tier is applied because the highest level in your bag is used first:
| Fertilizer | Effect |
|---|---|
| Dense Fertilizer (Lv 1) | +5% chance for a double harvest |
| Dense Fertilizer (Lv 2) | +10% chance for a double harvest |
| Fancy Fertilizer (Lv 1) | +10% chance for a higher quality crop |
| Fancy Fertilizer (Lv 2) | +20% chance for a higher quality crop |
Pay attention to which one you are making. Crop prices run on four quality tiers — a Cauliflower ranges from 250g at tier 1 to 500g at tier 4 — so Fancy fertilizer is the higher-value one for anything expensive, while Dense is better for high-yield cheap crops like Wheat and Hay. Note that the "highest level in bag is used first" rule means carrying Lv 2 fertilizer spends it on whichever tile you touch, so plant selectively.
Making Watering Optional
Three systems let you stop watering by hand, and they are the real mid-game upgrade:
| Item | Effect | How you get it |
|---|---|---|
| Lesser Offering of Rain | Place in a Ritual Brazier to water crops automatically for 4 days | Crafted at the Witching Mortar |
| Medium Offering of Rain | Automatic watering for 8 days | Crafted at the Witching Mortar |
| Greater Offering of Rain | Automatic watering for 16 days | Crafted at the Witching Mortar |
| Lesser Rune of Growth | Break it to add +1 crop growth — crops grow one extra time at night | Possible loot from Farm Boxes |
| Enchanted Pitchfork | Harvests wandering crops on contact while in your inventory | Crafted at the God Forge while aligned with Hagroth |
The Offerings of Rain are the single best farming investment in the game — a Greater Offering covers over half a 28-day season. And because they come from the Witching Mortar rather than a shop, they are independent of the seed economy. The Pitchfork solves a different problem: some Elderfield crops get up and move, and a tool that harvests them on contact is the only hands-free way to deal with that.
Two random events also accelerate growth: the sleep event Crop Growth makes crops grow one extra time during the next moon event, and the Strange Moon event grows everything one extra time that night.
Which Crops Are Worth It
All figures from the official wiki. Sell prices span the four quality tiers, so the range below is tier 1 to tier 4, and the "per night" figure is a rough tier-1 estimate to make crops comparable — it is our arithmetic, not a game number.
If you want one clean comparison, use the no-star profit-per-day baseline below. It subtracts the seed cost, uses the midpoint of any yield range, and divides the full planting cycle by its growth nights plus every regrowth interval. Quality stars, Luck, Farming skill, fertilizer, double-harvest effects and the Travelling Merchant can all push the real return higher.
| Season | Best baseline | Profit per day | Easier fallback | Profit per day | Planning catch |
|---|---|---|---|---|---|
| Rebirth | Peas | 24.58g | Strawberry | 17.22g | Pea Seeds are sold only at the Harvest Festival, so this is a stockpile play |
| Harvest | Peas | 24.58g | Dread Pepper | 15.78g | Buy Peas at the festival; Dread Pepper comes from the seasonal vendor |
| Witch | Devilberry | 17.27g | Squash | 13.33g | Both are seasonal-vendor crops; Gloom Hops is the regular-shop fallback at 11.25g |
| Death | Ghostberry | 14.50g | Deathleaf | 13.75g | Both are seasonal-vendor crops; Gloom Hops remains available in this season |
Those numbers compare one bought seed through its complete harvest cycle; they do not assume that you immediately replant a one-harvest crop. Peas lead Rebirth and Harvest only if you carried seed forward from their one-day sale. In a fresh Rebirth with no stockpile, Strawberry is the stronger repeat-harvest option, while Radish remains the cheap four-night choice when cash or unlocked seed stock matters more than maximum return per occupied tile.
| Crop | Seed | Nights | Regrows | Yield | Sells for | Seasons | Roughly per night |
|---|---|---|---|---|---|---|---|
| Wheat | 5g | 4 | — | 1–3 | 12–24g | 3 seasons | 3–18g |
| Eyeball (Eyeleaf) | 5g | 4 | — | 1 | 26–52g | All four | 6–13g |
| Radish | 10g | 4 | — | 1 | 40–80g | 3 seasons | 10–20g |
| Hay | 10g | 4 | — | 1–6 | Raw Hay at 7g each | — | Feed crop, not a cash crop |
| Pumpkin | 20g | 8 | — | 1 | 90–180g | Summer, Autumn | 11–22g |
| Bean | 25g | 8 | 2 | 1–3 | 26–52g | 3 seasons | 3–19g, better long-run |
| Coffee Bean | 150g | 12 | 2 | 3–4 | 35–70g each | Spring, Summer | 9–23g, strong on regrow |
| Cauliflower | 50g | 16 | — | 1 | 250–500g | 3 seasons | 16–31g |
| Soulfruit | Reward only | 24 | — | 1 | 1000–2000g | All four | 42–83g |
Reading that table:
- Radish is the correct first cash crop. 10g in, 40–80g out, four nights, and it grows in three of the four seasons. Nothing else on this list pays back as fast for as little.
- Eyeball is the one to plant in winter. It is the rare crop that is in season all year, so it is what you put in the ground when you are approaching a season change and cannot afford to guess.
- Cauliflower and Pumpkin are the value crops if you have the season runway. Note the Cauliflower night count — 16 nights still ties up a plot for more than half a 28-day season.
- Coffee Bean has the best regrow economics. Three to four beans per harvest at 35–70g each, and it regrows twice, which is the only way a 150g seed pays for itself comfortably.
- Soulfruit is in a different league — 1000–2000g a fruit, all four seasons — but its seed is a reward rather than a purchase, so it is a bonus rather than a plan.
Outside the crop plots there are three other planting surfaces: flower plots in front of the Farmhouse (Nursery seeds, planted and watered like other crops), grassy tiles for tree seeds, and the large special 2×2 plots west of the Farmhouse. Trees remain the low-maintenance option, while flowers need watering to progress. Gorgon's Eye — a 12-night flower selling at 300g — is also one of the most widely liked gifts in the game.
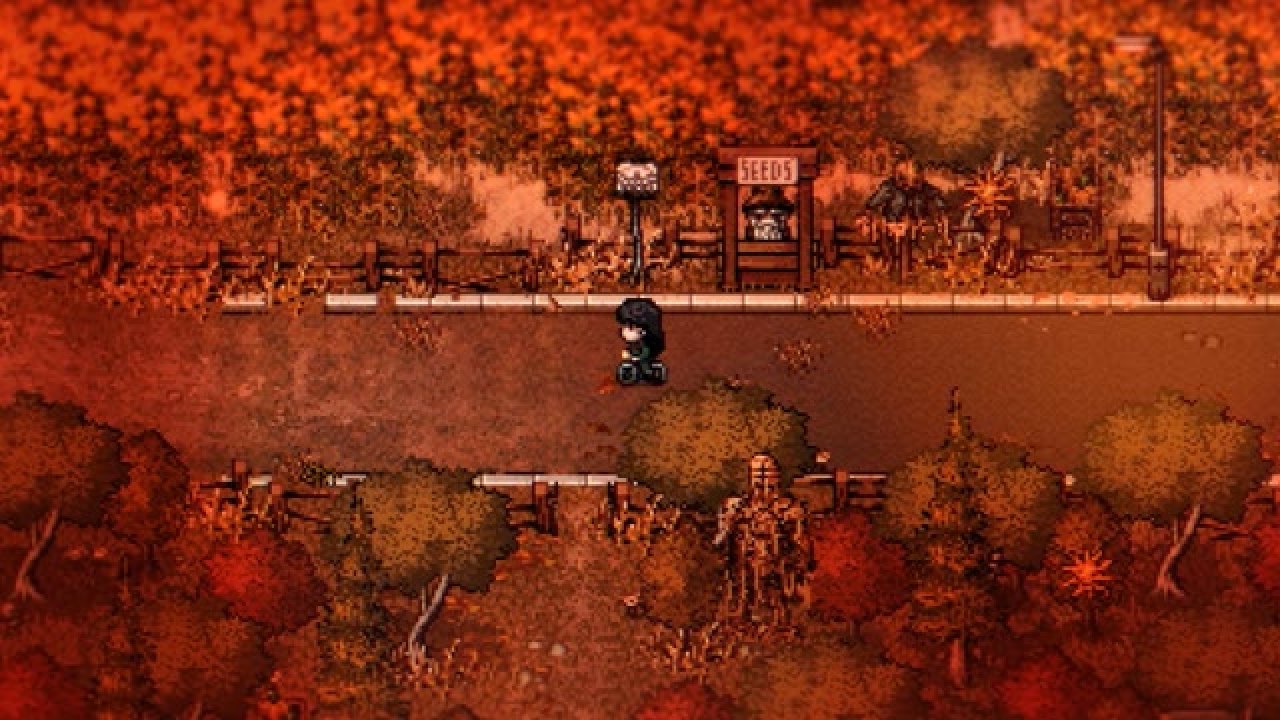
FIG. 02 — Seed stock is gated. Old Man Crawford sells the basics; the rarer seeds come from seasonal vendors and task rewards.
Cash Crops: The Seasonal Seed Vendor, and the Weekend Buyer
Everything in the table above is bought from Old Man Crawford and is available all year. The bigger money sits with a second seller: a seasonal seed vendor who sets up on the road to the farm and stocks varieties that pay several times what a Radish does. Two habits turn that into income rather than a curiosity.
First, know his schedule, because it is narrow. He appears on Mondays and Fridays and only during the seasons his stock belongs to — tomatoes are sold in Harvest only, and he does not appear at all during Rebirth. One of his varieties is narrower still: peas are sold on a single day, the second-to-last day of Harvest, during the Harvest Festival. Miss that and the seed is gone for a year.
Second, sell to the weekend buyer rather than the shops. Players report that a merchant who turns up at the weekend pays roughly 1.5× the ordinary produce price, which is why the habit worth forming is holding your best harvest back and bulk-selling rather than dumping crops the day they ripen. It leaves you short of cash for a few days and pays for itself when he arrives.
| Crop | Seed | Regrows | Harvests | Yield | Sells for | Season |
|---|---|---|---|---|---|---|
| Dread Pepper | 10g | 2 | 3 | 2–3 | 35–70g each | Harvest |
| Tomato | 35g | 3 | 4 | 1–2 | 70–140g each | Harvest, plantable in Witch |
| Watermelon | 20g | — | 1 | 1 | 200–400g | Harvest |
| Squash | 10g | — | 1 | 1 | 170–340g | Witch |
| Devilberry | 60g | 1 | 2 | 2–3 | 50–100g each | Witch |
Prices follow the same four quality tiers as the crops above, so each "sells for" is a tier 1 to tier 4 range. There are two speeds in this set and that is what you are really choosing between: Dread Pepper and Squash come in at around 12 nights and Devilberry at around 8, while Watermelon and Tomato are the slow pair, at closer to 16. The slow two hold the tile for weeks, so plant them early in the season or not at all.
- Dread Pepper is the one to plant first. The seed costs less than a Radish seed, it regrows twice, yields two or three peppers a pick, and it grows in half the time of the slow pair. It is the rare seed where the cheap option is also the fast one.
- Watermelon is the single biggest ticket on the list — a 20g seed for a fruit that sells for up to 400g — but it yields one fruit from one harvest and occupies the tile for weeks. It is an investment crop: buy seed only with money you are happy to have tied up.
- Squash is the cheap version of that bet. A 10g seed selling for up to 340g makes it the strongest value-per-gold on the list, and it does it on the fast timeline rather than the slow one. If you are in Witch season and have a free plot, this is the crop.
- Tomato is the flexible one. It is the only variety here that can be planted in a second season, which makes it what you sow when you are straddling the turn from Harvest into Witch, or when you want a regrowing crop and missed the Dread Pepper window.
- Devilberry is fast but expensive. At 60g a seed it is the priciest entry on the list, and the only thing it really buys you over Dread Pepper is speed. Worth it when you want a plot turning over quickly; not worth it when money is tight.
Seed price is only half the sum — the tile is the other half. A 60g Devilberry and a 10g Dread Pepper can both be good buys, but not on the same plot in the same season: the Dread Pepper earns more per night in the ground. Work out what a tile earns per night, not just what a crop sells for, and the seasonal list stops being a gamble.
The Tax Man Is Not Optional
The Tax Man's first visit is on day 4, then he returns every two weeks demanding produce as payment. Keep Wheat and Radishes from your opening harvest instead of selling or cooking all of them. The outcome is a lasting status effect either way — a blessing if you pay, a curse if you do not — and it lasts until his next visit rather than expiring on a timer.
| If you pay | If you do not |
|---|---|
| Growth (crop quantity +5%) Burgeoning (crop quality +5%) Tax Boon (Defence and M. Defence +10%) Plenty (+25% chance of good sleep rolls) | Carrion (crows eat 10% more crops) Blight (crop quality and quantity −10%) Tax Plague (Attack and M. Attack −10%) |
Pay. Tax Plague at −10% to both damage stats is more expensive than the produce, and Blight and Carrion compound with each other on the same harvest. If you want a specific outcome, the four paid results are all farm-relevant except Tax Boon, which is the combat one and worth keeping in mind before a boss.
What the 1.0.1 Patch Changed for Farmers
The first post-launch balance patch leaned on farming harder than on any other system, and almost all of it is in your favour. If you are working from a launch-week plan, these are the numbers that moved under you.
| Change | What it means on the farm |
|---|---|
| EXP curve lowered by about 30% | You level noticeably faster, so the tool and gathering tiers arrive sooner than they did at launch |
| Multi-tile hoeing and watering doubled in speed | Once your hoe or can covers several tiles, each pass works twice as fast — the biggest time saving a large field gets |
| Bad gathering outcomes cut in half | The chance of a bad mining or gathering result is halved, and debris does half the damage it used to |
| Cheaper early forge recipes | Most early-game forge recipe material costs came down, and leather was removed from the copper recipes entirely |
| Cheaper storage and processing | Preserving Barrels, Kegs, Furnaces and Grinders all cost fewer materials — the craftables the farm economy actually runs on |
| Cooking stations can pull from storage | A cooking station can be set to take ingredients straight from Primary Storage, so you no longer have to carry every ingredient in your bag |
| Bad sleep rolls | Permanent stat loss from a bad sleep roll no longer occurs on Normal difficulty or lower, which is what made a bad night's sleep genuinely costly |
Two of those change how you should plan a day. The doubled multi-tile speed means the Watering Can and Hoe upgrades are worth chasing earlier than launch guides suggest — the tier that covers three tiles now works at the speed the old tier covered one. And the EXP curve cut means the levels that gate your gathering and tool tiers come around roughly a third sooner, so the early-game squeeze on materials is shorter than it used to be.
A September 22 follow-up also fixed upgraded Watering Cans charging their distance at the old speed when used on flowers. Flower beds now get the same faster charge timing as ordinary crop plots, so hold the action only until the highlighted range reaches the number of tiles you want.
The farming loop is materially cheaper to run than it was in version 1.0: recipes cost less, the processing machines cost less, hoeing and watering a wide field takes half the time, and bad nights no longer cost you permanent stats on Normal. It is worth a second look before you decide the field is too slow to be worth the tiles.
Troubleshooting
| Problem | Cause | Fix |
|---|---|---|
| Cannot plant on a tile | Ghost Tentacles are still on it, or it is not tilled | Clear with Cleansing Balm, then hoe it |
| Watering has no effect | There is no seed in the tile | A tile can only be watered after planting |
| Crop should have matured but has not | Grow times are nights and the planting day does not count | Add one to the listed figure — a 4-night crop planted on day 1 is ready on day 5 |
| Crop has not grown for days | It is not being watered | Unwatered crops pause rather than die. Water it, or use an Offering of Rain |
| Whole field died at once | The season changed and those crops were out of season | Check season coverage before planting; plant Eyeball when you are close to a change |
| Crops keep disappearing | Crows — and only while the crop is still growing | One scarecrow per field. Upgrade it rather than adding more |
| Ran out of Cleansing Balm | Crawford stocks only 8 at a time | Hans gives 8 more; the farm visitor and Edwin also gift it; otherwise forage the Mall Mine |
| Weeds spreading across plots | No scythe pass | Clear them with the Scythe, not the hoe |
Images on this page are from the Welcome to Elderfield Wiki, used under CC BY-SA 4.0.
Did this answer your question?
What was missing?
Thanks — noted.